

The model is the AI system that reads your request and produces a response. The thinking level controls how much reasoning effort the model uses for that request.
Open your study project and a conversation. If you need to connect your account, follow Sign in to the desktop app.
Select a model
-
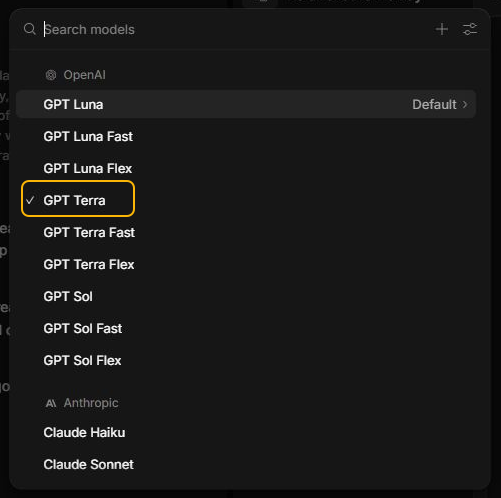
Select the model name in the request box. In the example, GPT Terra is selected and has a check mark.
-
Type part of a name in Search models. For example, type
GPT Lunato narrow the list to choices with that name.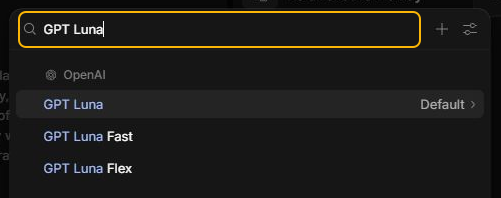
-
Select a result and confirm that its name appears in the request box.
InsightGig starts with a model and thinking level selected. You can send your first request with those settings.
The Default label in the model list identifies the default model. The check mark shows the model this conversation is using. They can appear on different rows.
If you can’t find a model, select the sliders icon to check Manage models. A managed workspace can also limit which models you see. Follow Manage model access and budgets to check both settings.
Check what a model can read
Point to a model in the picker to see the inputs it supports. For a concept card or a pack design, look for image input before sending the image with your request.
The details can also show a Context limit. This is how much material fits into a single model request, measured in tokens. Tokens are pieces of text, and the count includes instructions and conversation history.
For several long transcripts, start with a small set. Ask for quotes and source references, then review the result before expanding the task.
Choose a thinking level
-
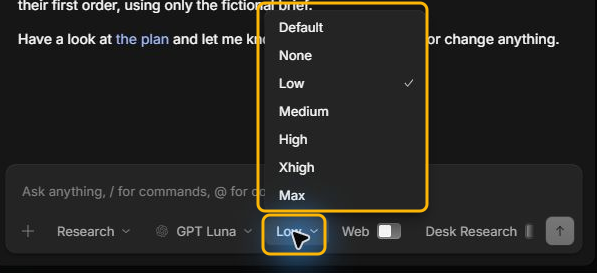
Open the thinking selector beside the model name. It may show the current level, such as Medium. Check the available choices for the selected model.
-
Select the level that fits your task. For example, choose Low for extracting stated facts from a short interview.
-
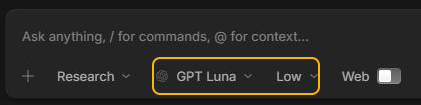
Check the model and thinking level before sending the request. Check them again after you change models or choose an agent mode.
Start with Default if you’re unsure. It uses the selected model’s default behavior. The menu varies by model, and a higher effort can take longer and use more credits.
Match the settings to the task
| Research task | Starting point | Check before expanding |
|---|---|---|
| Extract claims from one interview | Try a lower effort on a short transcript with a defined list of fields. | Compare each quote with the transcript and flag missing fields. |
| Compare several interview findings | Try a higher effort when the request involves conflicting evidence or several constraints. | Check that each theme covers exceptions and links to its source. |
| Review packaging or concept images | Choose a model that lists image input. | Compare the text and visual details in the reply with the original image. |
Try the same small task if you need to compare models. Use the same brief and sources, then check which reply best supports the decisions you need to make.
Next steps
Use Give agents context to point to your sources before sending. Review the credits used in Check credits and usage.