

Credits pay for use in your InsightGig workspace. If you manage your own workspace and have card billing, you can buy one-time credits through Stripe. On a shared workspace, ask an admin to make the purchase.
For an enterprise agreement where InsightGig adds credits for you, check Credits in Overview. Contact your billing administrator or InsightGig account contact when you need a top-up. Use the process and invoice provided under your agreement.
Open Add credits
-
Open your workspace in the Console. Confirm the workspace name beside the InsightGig logo.
-
Select Add credits in the Credits card on Overview. You can also go to Settings > Billing and select Add credits under One-time credits.
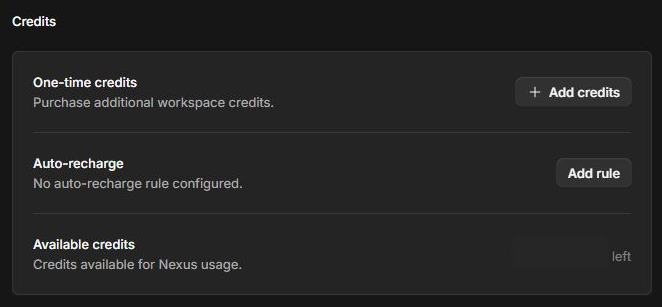
-
Choose a preset amount under Amount, or select Other and enter the amount you want. Review Credits, Processing fee, and Total before tax.
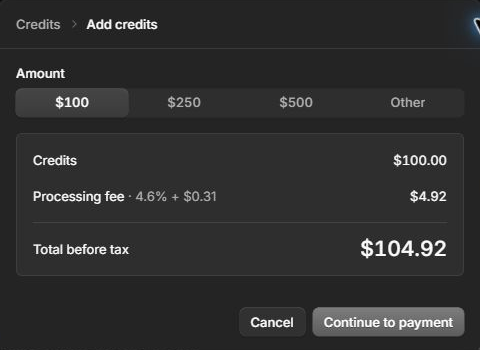
If you can’t use Add credits, check that you are an admin and that card billing is available for that workspace. Use Cancel to leave the form before continuing to Stripe.
Review and pay in Stripe
- Select Continue to payment to open the Stripe checkout page.
- Check the workspace purchase amount and total before entering payment details. Review any tax or currency information shown.
- Follow Stripe’s prompts for your card and billing address. Use Stripe’s payment button once you have checked the total and are ready to pay.
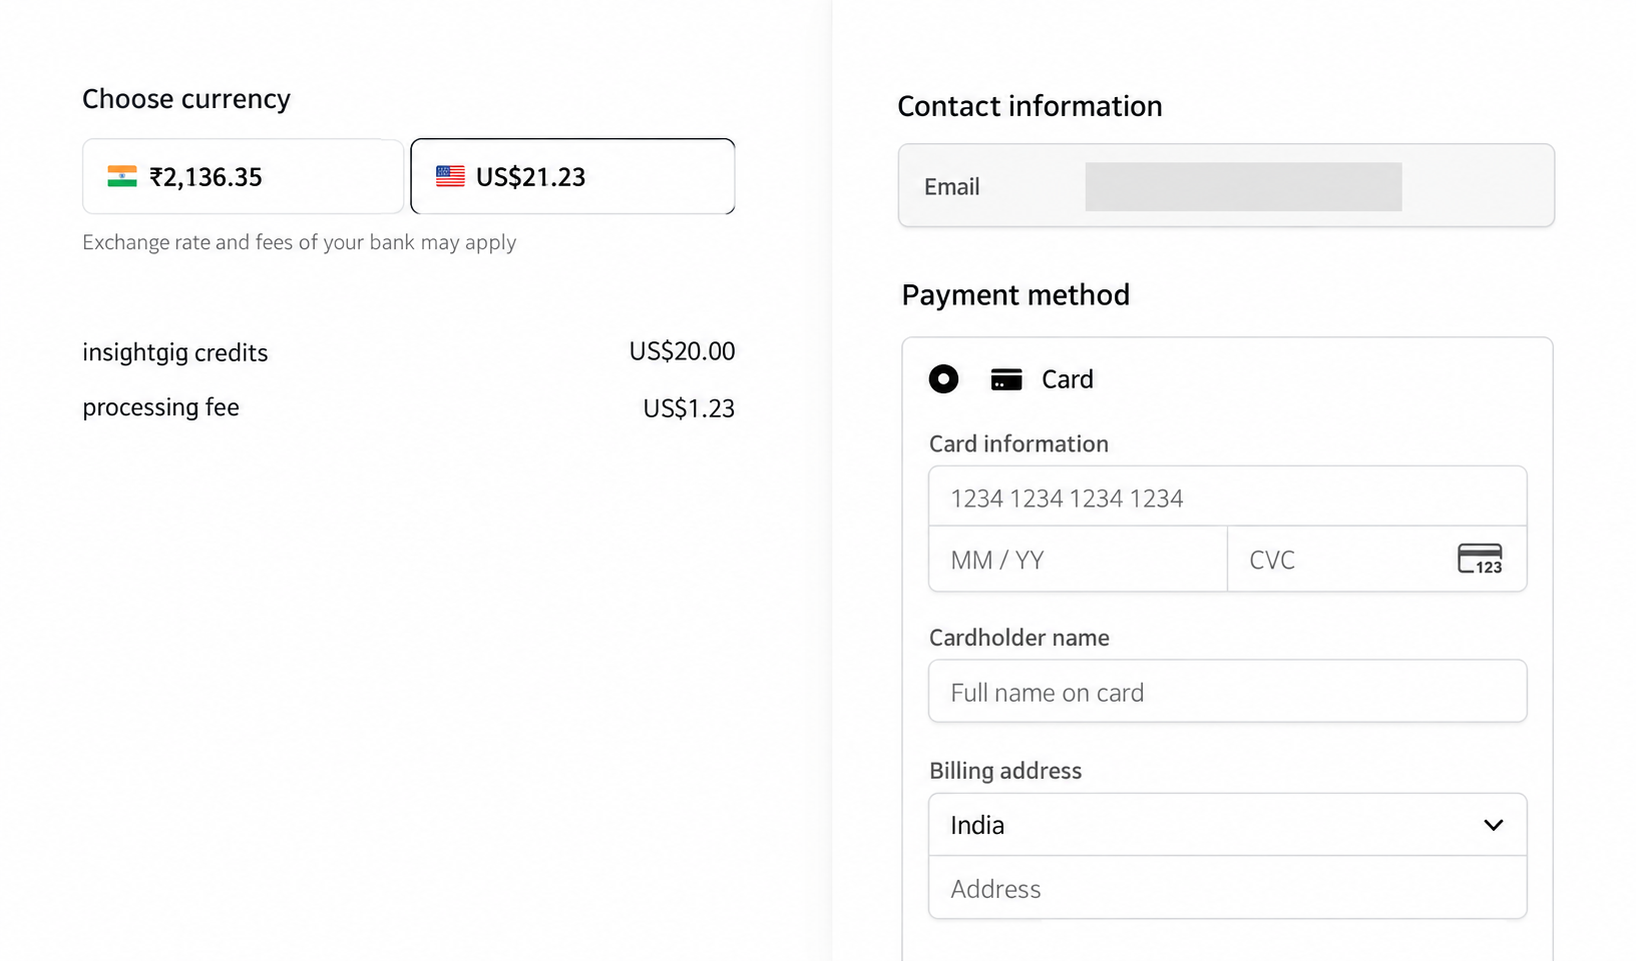
Use the amount and currency shown in your own checkout. The screenshot shows one example purchase.
Return to Overview and check Credits once payment completes. Follow Find billing invoices to save the receipt or invoice.